Installing a Bose Subwoofer in a Jeep

SteelHeadz

Super Moderator
Written and Compiled by: SteelHeadz​

This is a D.I.Y. project to upgrade your existing basic sound system to a Bose amplified with a Bose subwoofer system that can be picked up from a local junkyard. Since I had removed the factory HVAC system, I was able to mount this on the firewall, in front of the passenger. The system sounds great, and is completely hidden.

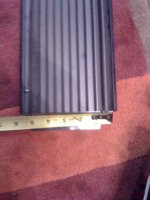
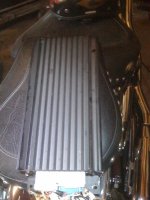
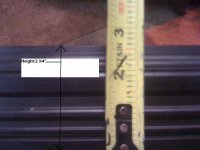
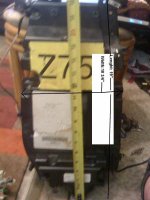
As a rule, if the face of the factory radio has the Bose name on it, it would include the amplifier and subwoofer needed for this project. I’ve supplied some pics and dimensions of the components as reference.
 
Last edited by a moderator:

The Bose Amp

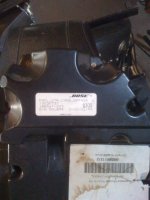
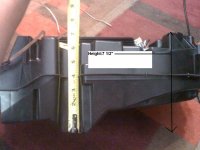
Here are some shots of the Bose amp from a 2002 GMC Yukon Denali.

These are easily found on GM vehicles equipped with the premium Bose sound system. The newer ones use the same amplifier but a different subwoofer (a little bit bulkier.) The speakers on the newer subs are similar in size with the TJ factory console subs.
 

Attachments

  • Picture_061.jpg
    Picture_061.jpg
    34.6 KB · Views: 910
  • Picture_062.jpg
    Picture_062.jpg
    37.4 KB · Views: 851
  • Picture_065.jpg
    Picture_065.jpg
    36 KB · Views: 854
  • Picture_067.jpg
    Picture_067.jpg
    28.8 KB · Views: 885
Last edited by a moderator:
The subwoofer

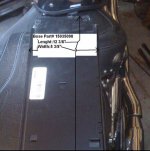
And these are a few shots of the subwoofer and enclosure, also from a 2002 GMC Yukon Denali.

Dimensions are given with the pictures. This is the set up I have on my 81 CJ7, mounted behind the dashboard out of sight from unscrupulous individuals that might think of something bad. It’s a crisp and deep bass sound with 2 Kenwood tweeters on the top dash, 2 6X9 Blaupunkt speakers on the roll bar. It could probably use another pair on the doors for more midrange, but that depends on the radio you pair up with this setup. The radio I’m using is a Pyle AM/FM/AUX/ CD player Marine. You can adjust the bass, treble, midrange, front and rear. Amazingly enough, the amplifier works better with a radio that has a low level output. The subwoofer fits perfect in between the front seats as well. The only thing you will need to do when mounting the sub wherever you choose is to fabricate some brackets. The subwoofer speaker enclosed in the box measures 6 7/8”x 4 ¼” and 3 ½ “ deep.
 

Attachments

  • Picture_059.jpg
    Picture_059.jpg
    34.9 KB · Views: 790
  • Picture_060.jpg
    Picture_060.jpg
    72.9 KB · Views: 868
  • Picture_064.jpg
    Picture_064.jpg
    28.8 KB · Views: 913
  • Picture_068.jpg
    Picture_068.jpg
    33.9 KB · Views: 1,308
  • Picture_069.jpg
    Picture_069.jpg
    34.2 KB · Views: 12,107
Last edited by a moderator:
Amp wiring

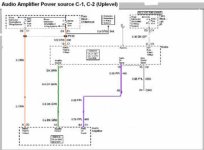
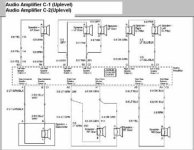
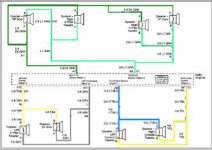
The amplifier connectors can easily intimidate anyone that is electronically challenged. I hope I can talk you out of that after this Basic electronics 101. As a rule of thumb in wiring color coding, red is a positive polarity lead, black is ground, orange is a switched positive lead and blue is a switched positive signal from another component. The step-by-step is pretty simple as long as you follow the color-coding from the diagram to the actual amplifier wiring.

NOTE: Not all of the wires will be used on the amplifier connectors.

I've attached the aplifier wiring document - take a look at it and compair to your amp before you begin.
 

Attachments

  • Bose_Amplifier_Edited_Master_wiring.pdf
    122 KB · Views: 1,567

Powering the amp

The first step in wiring this system up is to get power to the amp. Remember to disconnect the battery from your Jeep before doing this.

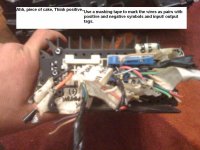
To better aid yourself with this project, use a narrow masking tape and a Sharpie black marker and sort out the wirings on the connectors according to the wiring diagrams and mark the wires as pairs. For example, Pin A1, A2, which is DK GRN and LT GRN is the right front speaker output, positive and negative.

Viewing the amplifier from the connector ends, heat sink upwards, there are 2 sets of connectors. The connector on the left is an 8 way (C-1 Connector.) It contains the orange (switched power), black (ground), light brown and purple (left rear output to speaker), white and red (left rear midrange) to speaker, Lt. Green / black and dark blue/ white is the output to the Bose subwoofer.

The connector to the right is a 24 way (C-2 Connector). Use the connector pin reference guide. The top row (12 pins) is numbered A1 thru A12. The bottom row is from B1 thru B12 pins. Pay close attention to the pin numbers corresponding with the wire colors so that it doesn’t confuse you. Pick a radio of your choice and wire it up with the amplifier. Install the amplifier input, outputs and power supply only. All the RSA (rear seat audio) controls and remote CD circuits are not used and should be insulated with a shrink tube or electrical tape.
 

Attachments

  • Picture_063.jpg
    Picture_063.jpg
    39.4 KB · Views: 1,694
  • Bose_amp._power.jpg
    Bose_amp._power.jpg
    27.8 KB · Views: 12,228
Audio inputs and outputs

Now, you need to wire the audio inputs and outputs. Remeber to reference the install PDF above
 

Attachments

  • Bose_Amp._audio_input.jpg
    Bose_Amp._audio_input.jpg
    35.6 KB · Views: 9,348
  • Bose_Amp._audio_input_3.jpg
    Bose_Amp._audio_input_3.jpg
    38.3 KB · Views: 8,012
  • Bose_Amp._audio_Output_circuits.jpg
    Bose_Amp._audio_Output_circuits.jpg
    35.9 KB · Views: 15,151
  • Bose_Amp._audio_Output_front.jpg
    Bose_Amp._audio_Output_front.jpg
    36.6 KB · Views: 14,464
Installing the Subwoofer

Once the amp is wired up correctly, you should be able to install the Subwoofer.

I had previously removed the factory HVAC, so I just fit my new sub into that space and secured it.
 
Last edited by a moderator:

Finished

Once you get the sub installed, you can hookup the power again and test everything out. You should now have some good base, without any loss of storage space, or the risk of thieves seeing it.
 
Last edited by a moderator:
Back
Top