PoliceMonkey161
New member
Topic for today: Replacing a 258 Oil Dipstick and Tube
So, this seems to be rather common problem.......... The oil dip stick tube broke on your 258! I have read many postings on the subject and received a lot of great ideas, but found no really good write-ups on how to do this. As with many projects involving your Jeep, there are many ways to go about a repair and this was mine....
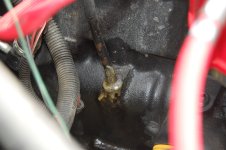
So, this is how the PO fixed it and to his effort, it worked for awhile.
<o >
>
 </o
</o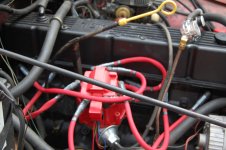
<o ></o
></o
First, I went down to my local Jeep dealership and found out that the original long style tube was discontinued and there really is no exact replacement. I was told that the newer style 4.0L tube would be close in length and should fit the hole in the block, but remodeling of the mounting bracket would be needed. For the record, the P/N's (MOPAR #) are 53020782 for the tube($10.50) and 53010445AB for the dipstick ($9.00). My friend "BUTTY"(from this site) mentioned that a 2.5L tube and stick would work as well and the dealer confirmed that, but they are hard to find. You can get the original long style tube (no dipstick included) from Morris 4X4 but it will cost you $190.00 plus shipping, no that is not a typo!
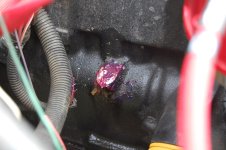
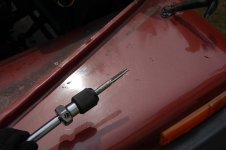
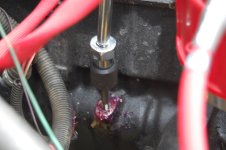
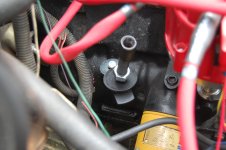
Removing the old tube was simple: broke off old tube at base and carefully cleaned off the PO's epoxy job. Next I packed the broken off tube with cold grease and used a 5/16th tap to thread the inside of the broken off tube. Then, I thread a 5/16th bolt and washer through a hub remover for my side hammer and into the broken off tube down in the block.
<o ></o
></o
<o >
>  </o
</o
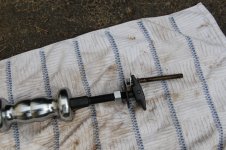
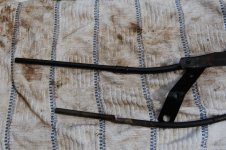
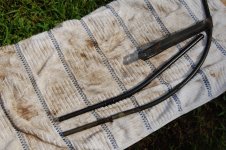
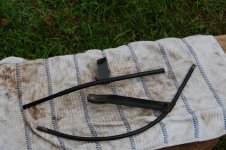
The tube came right out with little effort! Next I compared the two parts to see what would need to be trimmed. About two inches of the new tube needed to be cut off and smoothed out. Then I cut off the factory bracket and re-tack welded it for a more professional look. I probably could have just bent the existing set up to fit....... But it only added 20 extra minutes and looks good.
<o ></o
></o
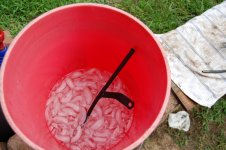
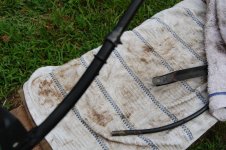
After a fresh coat of high temp. paint, I put it in a bucket of ice water to contract the metal a little. After 10 mins. or so, I put a bead of RTV around the base and installed my new dipstick tube. You will need to mark the new stick for the correct "FULL" level. Mine was full before I began, so I just dipped it in and scribe the new mark. Afterwards, I changed the oil just in case something fell down inside the block.
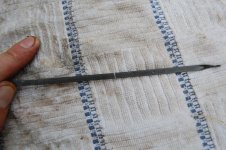
<o ></o
></o
I really wanted the original length tube, but maybe there is a reason they are no longer available. The new style is shorter, but certainly out of the way of another accident waiting to happen. Total time has about an hour start to finish.
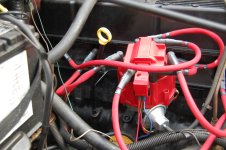
So, this seems to be rather common problem.......... The oil dip stick tube broke on your 258! I have read many postings on the subject and received a lot of great ideas, but found no really good write-ups on how to do this. As with many projects involving your Jeep, there are many ways to go about a repair and this was mine....
So, this is how the PO fixed it and to his effort, it worked for awhile.
<o
 </o
</o
<o
First, I went down to my local Jeep dealership and found out that the original long style tube was discontinued and there really is no exact replacement. I was told that the newer style 4.0L tube would be close in length and should fit the hole in the block, but remodeling of the mounting bracket would be needed. For the record, the P/N's (MOPAR #) are 53020782 for the tube($10.50) and 53010445AB for the dipstick ($9.00). My friend "BUTTY"(from this site) mentioned that a 2.5L tube and stick would work as well and the dealer confirmed that, but they are hard to find. You can get the original long style tube (no dipstick included) from Morris 4X4 but it will cost you $190.00 plus shipping, no that is not a typo!
Removing the old tube was simple: broke off old tube at base and carefully cleaned off the PO's epoxy job. Next I packed the broken off tube with cold grease and used a 5/16th tap to thread the inside of the broken off tube. Then, I thread a 5/16th bolt and washer through a hub remover for my side hammer and into the broken off tube down in the block.


<o
<o
 </o
</oThe tube came right out with little effort! Next I compared the two parts to see what would need to be trimmed. About two inches of the new tube needed to be cut off and smoothed out. Then I cut off the factory bracket and re-tack welded it for a more professional look. I probably could have just bent the existing set up to fit....... But it only added 20 extra minutes and looks good.


<o
After a fresh coat of high temp. paint, I put it in a bucket of ice water to contract the metal a little. After 10 mins. or so, I put a bead of RTV around the base and installed my new dipstick tube. You will need to mark the new stick for the correct "FULL" level. Mine was full before I began, so I just dipped it in and scribe the new mark. Afterwards, I changed the oil just in case something fell down inside the block.


<o
I really wanted the original length tube, but maybe there is a reason they are no longer available. The new style is shorter, but certainly out of the way of another accident waiting to happen. Total time has about an hour start to finish.

Last edited:
