Installing an upgraded radio in your Wrangler is a pretty straight forward procedure. You simply remove the old one, connect the custom wiring harness to the new radio, install the radio, then button everything up.
You are using an out of date browser. It may not display this or other websites correctly.
You should upgrade or use an alternative browser.
You should upgrade or use an alternative browser.
Radio install on a Wrangler
- Thread starter TerryMason
- Start date
Necessary components
You'll need a few items to get your new radio installed.
1. New radio
2. Wiring harness
3. faceplate
4. Amp install kit and amplifier (if you are installing an amp)
5. Antenna extension
You'll need a few items to get your new radio installed.
1. New radio
2. Wiring harness
3. faceplate
4. Amp install kit and amplifier (if you are installing an amp)
5. Antenna extension
Attachments
Step 1 - Removing the stock radio
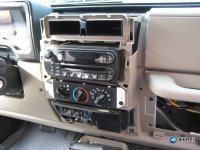
To remove the stock radio, you'll need to first pry up the plastic panel over the defroster vents. To pop this panel up, just poke your fingers through the grate over the vent.
Once you have the defroster cover up, you'll be able to remove the two bolts holding on the console cover.
After that, you'll be able to pull off the black cover over the center dash cover.
Attachments
Step 2 - Removing the stock radio
To remove the stock radio, you'll need to first unbolt the for bolts on the front of the radio.
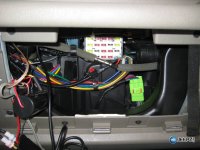
Now, remove the glovebox door and disconnect the antenna. It's the silver connector in the middle
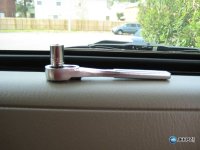
Next comes the hard part. You'll need to use a socket wrench to reach through the glove box door, up behind the radio and unbolt the single nut holding the stock radio in. Once that's out, you'll be able to pull the radio out and unclip the stock wiring harness.
Attachments
Last edited:
Step 3 - Connecting the harness
The stock radio uses a proprietary connector, so to connect your new radio to the Jeep, you'll need an adapter. You'll need to purchase an adapter and connect the adapter to your new radio using the supplied wiring chart.
You can try twisting the wires together and taping them, or using scotch locks, but my preferred method is to solder the wires together.
Attachments
Step 4 - Replacing the radio
Once the wiring harness is completed, just plug it up, connect the antenna (using the extender), then insert the radio into the dash. Return the four bolts to hold the radio in and you're good to go.
Once the wiring harness is completed, just plug it up, connect the antenna (using the extender), then insert the radio into the dash. Return the four bolts to hold the radio in and you're good to go.
Attachments
Installing the amplifier - Running the power
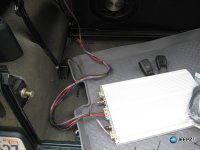
To install the amplifier, you'll need to first wire up the power wire (with fuse) directly to the battery. To go through the firewall, be sure to use a grommet.
Remember to route your main power wires away from the radio wires. I chose to route the power down the side of the Jeep, and the radio wires down the center.
To install the amp's ground wire, you'll need to find a good strong bolt into the body, then sand off the paint and bolt down the wire. I used the rear seat bracket for my ground spot.
Attachments
Installing the amplifier - running the radio wires
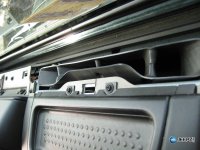
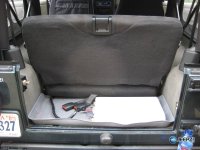
You'll then need to route the radio wires to the amp. I installed my amp in the rear, and routed the radio wires under the center console, and then under the carpet to the amp.
You'll then need to route the radio wires to the amp. I installed my amp in the rear, and routed the radio wires under the center console, and then under the carpet to the amp.
Attachments
Finished installing your Wrangler's radio
That's it, you're finished installing your radio, and can enjoy your new tunes!
That's it, you're finished installing your radio, and can enjoy your new tunes!
HarleyGold
New member
Re: Finished installing your Wrangler's radio
this will help big time! 1st time installer and i love the pictures! :shades:
this will help big time! 1st time installer and i love the pictures! :shades:
Similar threads
- Replies
- 3
- Views
- 2K
- Replies
- 0
- Views
- 9K
- Replies
- 14
- Views
- 9K


